
Add a new booking
Write a booking into the diary in under a minute: customer, date, slot, hall, amount and advance.
 Watch the video · 1:19opens on YouTube
Steps
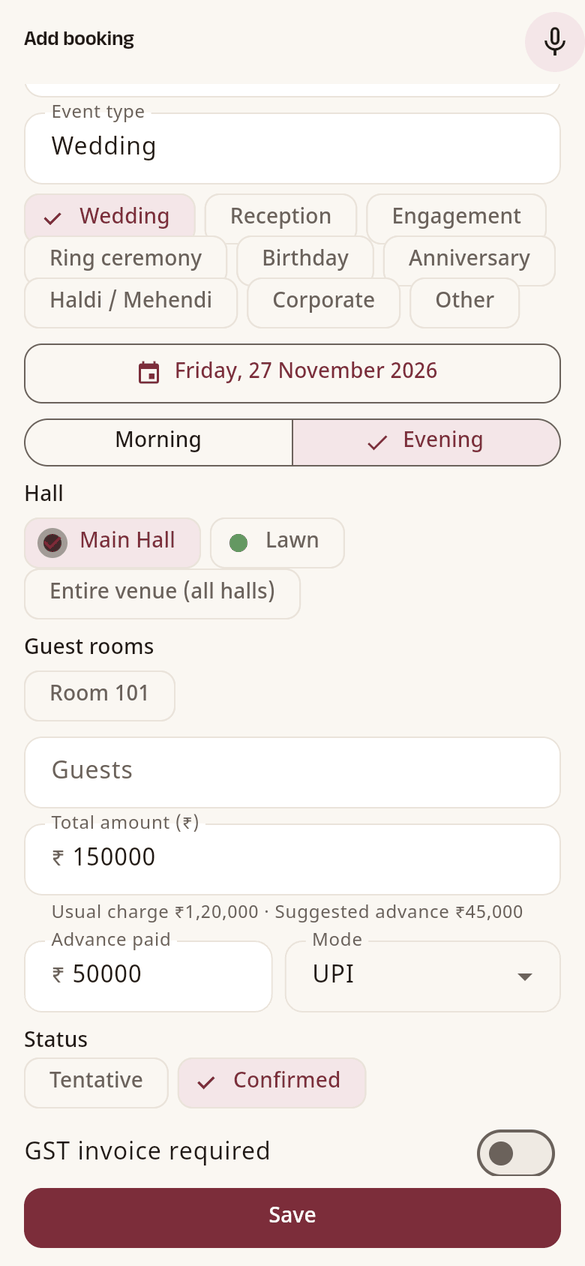
- On Home, tap New booking (the + button). The Add booking form opens.
- Type the Customer name and Phone. To save typing, tap the contacts icon next to the name and Pick from contacts.
- Tap an Event type (such as a wedding or a birthday), tap the date to choose the day, and pick the Slot: Morning, Evening or Full day (one function from morning to night).
- Under Hall, tap the hall the customer wants, or Entire venue (all halls). If your venue has guest rooms, tap the ones that go with this booking. When the customer wants only rooms and no hall, tap Guest rooms only: the halls stay free for other bookings.
- Under Bill, check the Hall rent (₹). HallDiary shows your usual charge, and the rooms and add-ons are added below it. If you agreed a discount, enter it with a short reason; the bill shows the Total.
- If the customer has paid an advance, type it in Advance paid (the suggested advance is shown under it) and choose the Mode (UPI, cash and so on).
- Choose the Status: Tentative when the date is only being held, Confirmed when the booking is final. Tap Save.
The booking appears on Home, in the Calendar and under Bookings straight away. If the advance is less than the total, the balance shows under Dues.
Optional details
- Guests: how many people are expected.
- GST invoice required: turn it on when the customer needs a GST bill, then fill in the Customer GSTIN and the Billing name (as per GST).
- Notes: anything to remember, such as the menu or decoration.
Fill the form by speaking
Tap the microphone at the top of the form and say the booking in one sentence, in Hindi or English, for example: “Sharma ji ki shaadi 15 November evening 400 log 98100 12345”. HallDiary fills in the name, event, date, slot, guests and phone. Check each field, add the amount, then tap Save.
Speaking needs the internet on the phone. Typing works without it.
If something stops you
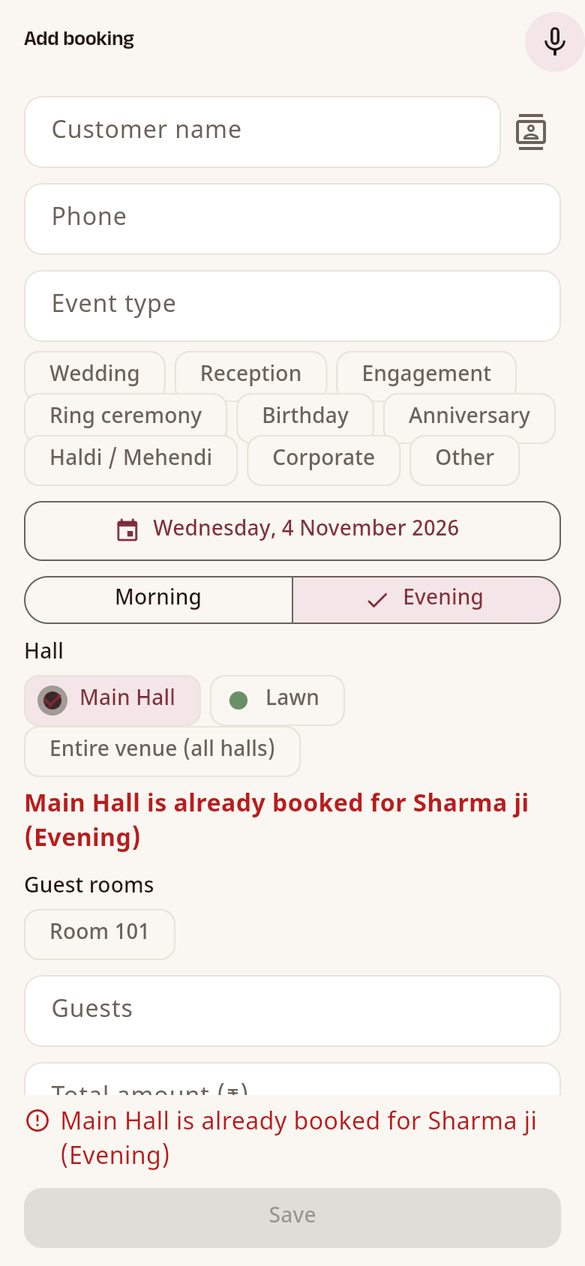
- A red line says the hall is already booked: another booking holds that hall for the same date and slot, and Save stays off. Pick another hall, slot or date, or open the other booking first.
- A line under the timing says Timing overlaps with another booking: the hours of this booking run into another booking's on the same day, in the same hall or guest room (a lunch that ends at 7 PM and a dinner from 6 PM). Save asks you to choose Change timing or Save anyway; HallDiary does not stop you, because the hours are yours to agree with both customers.
- “This date is in the past”: a reminder only. You can still save, for example to record an old booking.
- The advance is more than the total: check both amounts; one of them has a typing mistake.
- No New booking button: in a team, your role may not allow adding bookings. Ask the owner of the diary.
- You cannot change the hall rent: only the owner and admins change it. Managers and staff can change room rates, add-on prices and other charges only if the owner allows it in Team settings.
- No internet: the booking is saved on the phone (“Saved on this phone · will sync”) and goes to the other devices once you are online.